Create the SBC Virtual Machine
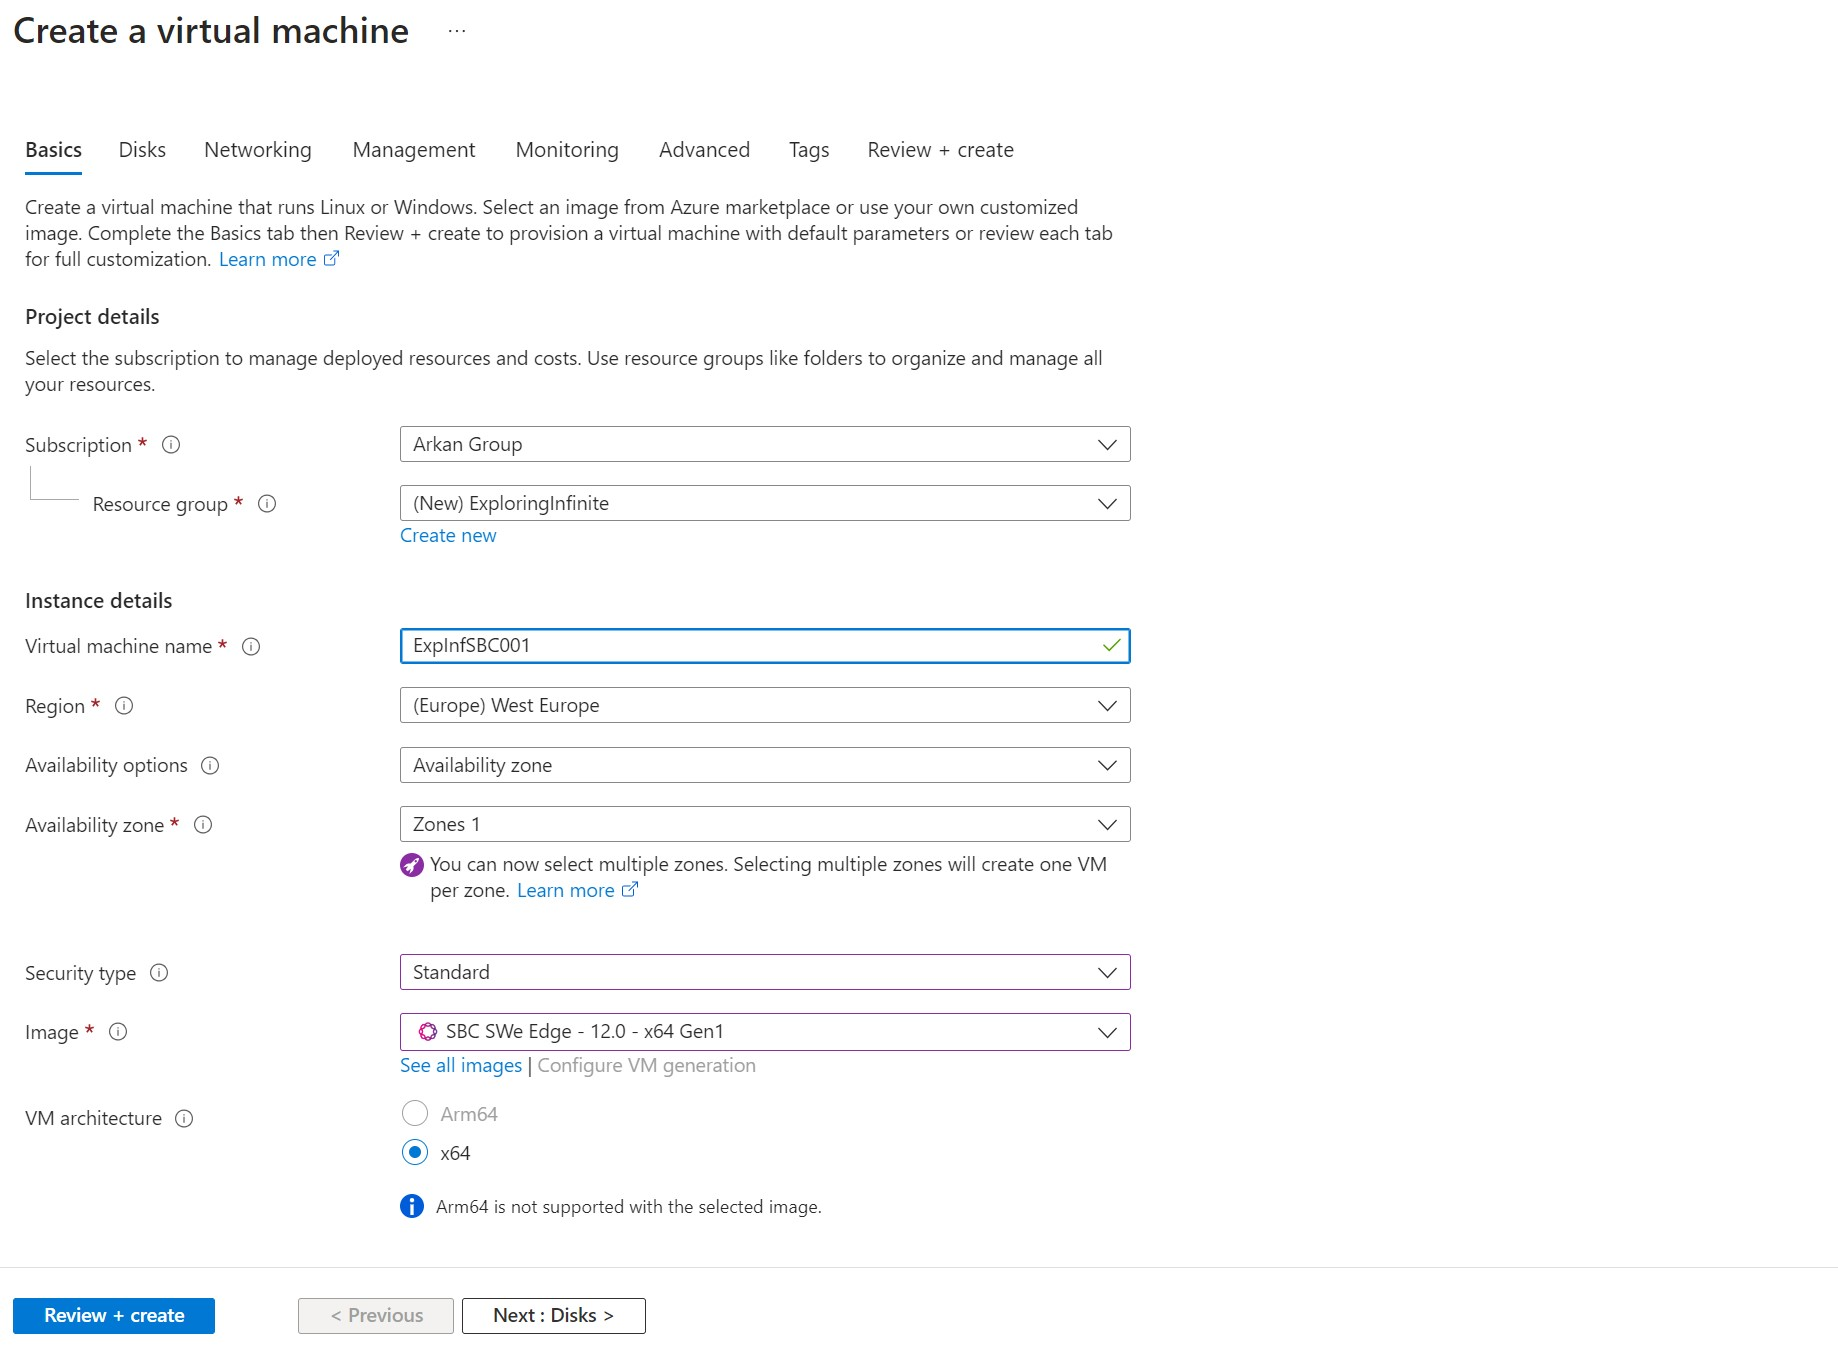
- Log in to MS Azure as an Administrator
- Click create virtual machine to start the process
- Create or select the subscription that will be charged the cost of this SBC instance
- Create or select the resource group you want to have the Ribbon SWE Edge in
- Enter the machine name
- Chose the Azure Zone to host this machine. The closer to your intended systems that you will connect you the better. In our case we will select west Europe as we will connect to Zoom
- Phone SBCs in Frankfurt/Amsterdam.
- In the "Security Type" select "Standard"
- In the "Image" select "SBC SWE Edge"
- In the machine size select "Standard_B1ms", please note that in case of more than 2 vNIC and/or high number of concurrent sessions you may need a larger machine size.
- Click next to go to "Disks" section.
- Select "Delete with VM", this will delete the VM disk whenever you delete it.
- Click Next to go to "Networking Section"
- Select or create a "Virtual Network", this will include all interfaces and subnets.
- Select or create "Subnet", this one will have the Admin interface of the created SBC
- Select or create the "Public IP", this will be the IP used to access the VM for management.
- You can select (optional) "Delete public IP and NIC when VM is deleted"
- Click Review-Create
- Click Create
- A pop up will show to "Create new key pair", you could have chosen to use an existing key in the previous screen. (better to have new key for each resource group)
- Save the key for later use. (very important to access the machine later via SSH)
Create the signaling subnet
- Go to the resource group you used to create the SBC VM
- In the resource click on the Vnet that includes the Admin interface created in the previous steps
- From the left menu click "Subnets"
- You should see one subnet with the name "default"
- Click + sign on the upper menu to create a new subnet
- You can name it "SignalingSubnet"
- Click Save
Create and attach the signaling interface
- Go to the resource group you used to create the SBC VM
- In the resources click the VM we created for the SBC
- Click "Stop" to stop the VM and wait till it stops successfully
- On the left bar click networking
- On the top menu click "Attach network interface"
- Click "Create and attach network interface"
- Make sure the same Subscription, Resource Group, Location are selected
- Add a name for the network interface for example "SGvNIC"
- In the "Subnet" select the subnet we created (in our case "SignalingSubnet")
- Click Create
Create and attach a Public IP to be used for Signaling
- Go to the resource group you used to create the SBC VM
- Click "Create" on the upper menu
- In the search type "public ip address"
- You can chose to create a "Public IP Address" or a "Reserved IP Address", in our case we will create "Public IP Address"
- Click Create
- Make sure the same Subscription, Resource Group, Location used for the VM are selected
- Add a Name for the IP, in our case "SignalingIP"
- Chose "SKU" "Standard"
- IP Address assignment "Static"
- Click "Review & Create"
- Click "Create"
- Make sure deployment shows complete
- Click "Go to resource"
- CLick "Associate IP"
- Chose "Resource Type" to be "Network Interface"
- In the network interface drop down select the vNIC we created for signaling. (in our case "SGvNIC")
- Click OK
Starting the configuration
- Go back to the VM we created
- Click "Netwoking" from the left toolbar
- Make sure two network interfaces are there and each has a public IP assigned.
- Take note of the IPs as we will need them later
- Start the VM and wait for a couple of miniutes
- type in the browser the IP of the admin interface to access the SBC
- The initial SBC system setup will show
Ribbon SWE Edge Initial SBC System Setup
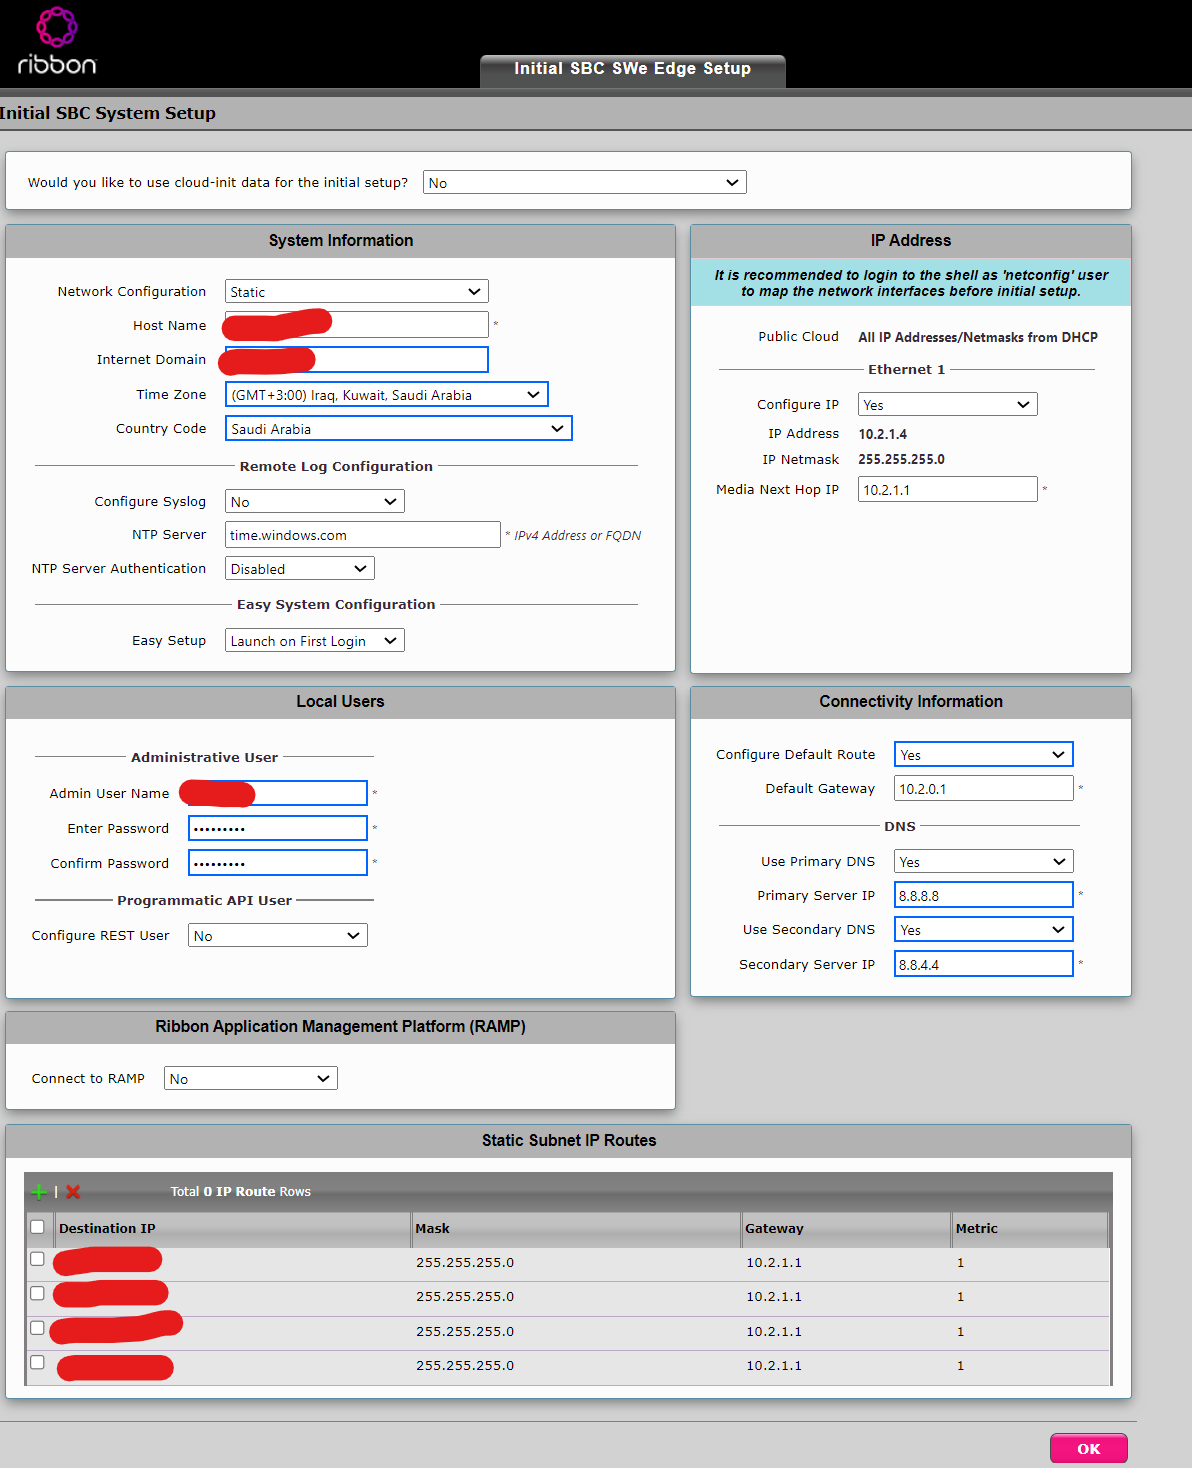
- Create a DNS A record for the fqdn you are going to use for this SBC. In our case we assume the A record is sbc001.mydomain.com.
- in the "Host Name" write the DNS A record prefix created (In our case sbc001)
- in the "Internet Domain" type the domain used. (In our case mydomain.com)
- in the username type the username that you will use later to login to the SBC web GUI
- enter the password for this username twice.
- On the IP address on the right enter the details for ethernet 1 IP address. This will be our signaling interface
- In the "Media Next Hop IP" type the IP that acts as the gateway for ethernet 1. This is where all the voice traffic will go through.
- In the defualt gateway, enter the IP that acts as the gateway for the Admin interface that you are currently accessing this web GUI through
- Enter your desired DNS servers that can be reached from the default gateway and/or Admin interface
- In the static Subnet IP route, enter the routes to the SIP servers you intend to connect to. The gateway should be the gateway entered for ethernet 1 interface above. We are directing all voice traffic through the signaling interface using these routing rules.
- Click Ok to finish the wizard
- If successful, you will be directed to the login interface of the SBC web GUI
- you can log in using the username and password created earlier